Published by City Farmer, Canada's Office of Urban Agriculture


Composting With Red Wiggler Worms
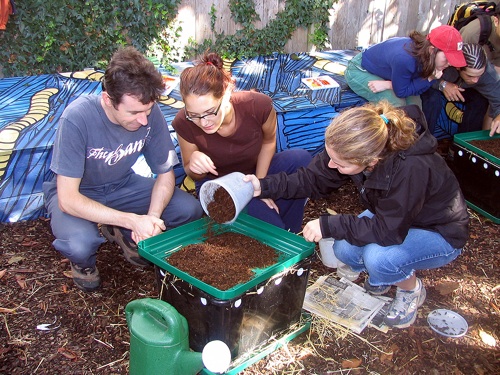
City of Vancouver - City Farmer Wormshop
See these links first.
City Farmer's Step-By-Step Photo Guide to Worm
Composting
See City Farmer's wormshop instructor describe how a worm bin works. (Video)
See City Farmer's wormshop instructor describe how to harvest a worm bin. (Video)
Metro Vancouver Worm Composting Brochure
See a list of red wriggler worm suppliers.
Basic Guide to Worm Composting
By Gillian Elcockand Josie Martens
(C) Copyright: City Farmer 1995
[Czech translation of this page here.]
[Indonesian translation of this page here.]
[German translation of this page here.]
[Spanish translation of this page here.]
[Hungarian translation of this page here.]
[Albanian translation of this page here.]
[Chinese translation of this page here.]
[Russian translation of this page here.]
[Ukrainian translation of this page here.]
[Italian translation of this page here.]
[French translation of this page here.]
Why Compost?
Recycling the organic waste of a household into compost allows us to return badly needed organic matter to the soil. In this way, we participate in nature's cycle, and cut down on garbage going into burgeoning landfills.
Why Compost With Worms?
Worm composting is a method for recycling food waste into a rich, dark, earth-smelling soil conditioner. The great advantage of worm composting is that this can be done indoors and outdoors, thus allowing year round composting. It also provides apartment dwellers with a means of composting. In a nutshell, worm compost is made in a container filled with moistened bedding and redworms. Add your food waste for a period of time, and the worms and micro-organisms will eventually convert the entire contents into rich compost.The following information is based on the experiences of a network of worm composters linked to City Farmer, Vancouver, and the excellent and practical book: Worms Eat My Garbage by Mary Appelhof. This book is provided to participants in the City of Vancouver/City Farmer Wormshops. This brief introduction to worm composting is only a basic guide, and while we have tried to include all the necessary information to get you and your worms started, we recommend that you also read the book - it is full of useful and fascinating details about this process. You can also make a visit to one of the Compost Demonstration Gardens in the Greater Vancouver to see worm compost bins actively working, and talk to experienced staff. Call the Compost Hotline, (604) 736-2250.
What Do I Need To Get Started?
A. CONTAINER
We use wood and plastic containers. Either build or buy, or use your imagination and recycle something like an old dresser drawer, trunk, or discarded barrel. We prefer wood because it is more absorbent and a better insulator for the worms. We use plastic containers but find that the compost tends to get quite wet. Experiment and find out what works for you and your worms.
Guide To Size Of Container
In Worms Eat My Garbage, Mary Appelhof suggests weighing your household food waste for one week (in pounds), and then provide one square foot of surface area per pound. The container depth should be between eight and twelve inches. Options to one large (and heavy) box are a number of smaller containers for easier lifting and moving and more choice of location. The book illustrates a variety of containers.Depending on the size of the container, drill 8 to 12 holes (1/4 - l/2 inches) in the bottom for aeration and drainage. A plastic bin may need more drainage - if contents get too wet, drill more holes. Raise the bin on bricks or wooden blocks, and place a tray underneath to capture excess liquid which can be used as liquid plant fertilizer.
The bin needs a cover to conserve moisture and provide darkness for the worms. If the bin is indoors, a sheet of dark plastic or burlap sacking placed loosely on top of the bedding is sufficient as a cover. For outdoor bins, a solid lid is preferable, to keep out unwanted scavengers and rain. Like us, worms need air to live, so be sure to have your bin sufficiently ventilated.
B. BEDDING
It is necessary to provide a damp bedding for the worms to live in, and to bury food waste in.Suitable bedding materials are shredded newspaper and cardboard, shredded fall leaves, chopped up straw and other dead plants, seaweed, sawdust, compost and aged manure. Try to vary the bedding in the bin as much as possible, to provide more nutrients for the worms, and to create a richer compost. Add a couple of handfuls of sand or soil to provide necessary grit for the worm's digestion of food.
It is very important to moisten the dry bedding materials before putting them in the bin, so that the overall moisture level is like a wrung-out sponge. The bin should be about three-quarters full of moistened bedding. Lift the bedding gently to create air spaces which help to control odours, and give freer movement to the worms.
C. WORMS
The two types of earthworm best suited to worm composting are the redworms: Eisenia foetida (commonly known as red wiggler, brandling, or manure worm) and Lumbricus rubellus They are often found in aged manure and compost heaps. Please do not use dew-worms (large size worms found in soil and compost) as they are not likely to survive.
Where To Get Your Worms?
If you feel adventurous, find a horse stable or farmer with a manure pile and collect a bagful of manure with worms. Check your own or a friend's compost bin for worms. You can also purchase worms. Call the Compost Hotline for more details on local (British Columbia) sources of redworms.And see our Worm Supplier page here.
How Many Worms Do I Need?
Mary Appelhof suggests that the correct ratio of worms to food waste should be: for one pound per day of food waste, use two pounds of worms (roughly 2000). If you are unable to get this many worms to start with, reduce the amount of food waste accordingly while the population steadily increases.
What Do I Feed My Worms?
You can compost food scraps such as fruit and vegetable peels, pulverized egg shells, tea bags and coffee grounds. It is advisable not to compost meats, dairy products, oily foods, and grains because of problems with smells, flies, and rodents. No glass. plastic or tin foil, please.To avoid fly and smell problems, always bury the food waste by pulling aside some of the bedding, dumping the waste, and then cover it up with the bedding again. Bury successive loads in different locations in the bin.
Where Should I Locate My Worm Bin?
Worm bins can be used indoors all year round, and outdoors during the milder months. The advantage of mobile bins is that they can be moved when weather conditions change. Indoors, basements are excellent locations (warm, dark and dry), but any spare space can be utilized, so long as temperatures are between (4-26 degrees C) (40-80 degrees F). We know dedicated worm composters who have convenient kitchen counter worm bins. Outdoors, bins can be kept in sheds and garages, on patios and balconies, or in the yard. They should be kept out of hot sun and heavy rain. If temperatures drop below 40 degrees F., bins should either be moved indoors, or well insulated outdoors.
How Do I Maintain My Bin?
If you have the correct ratio of surface area to worms to food scraps, there is little to do, other than adding food, until about two and a half months have passed. By then, there should be little or no original bedding visible in the bin, and the contents will be brown and earthy looking worm castings. The contents will have substantially decreased in bulk too.It is important to separate the worms from the finished compost, otherwise the worms will begin to die. There are several ways to do this. and you can discover which is best for you. The quickest is to simply move the finished compost over to one side of the bin, place new bedding in the space created, and put food waste in the new bedding. The worms will gradually move over and the finished compost can be skimmed off as needed.
If you have the time or want to use all the compost, you can dump
the entire contents of the bin onto a large plastic sheet and separate
the worms manually. Most children love to help with this process and you
can turn it into a fun lesson about worms for them. Watch out for the
tiny. lemon-shaped worm cocoons which contain between two and twenty
baby worms! By separating the worms from the compost, you save more
worms for your next bin. Mix a little of the finished compost in with
the new bedding of the next bin, and store the rest in plastic bags for
use as required.
Where Do I Use My Compost?
The compost can be mixed with potting soil and used for houseplants and patio containers. It is an excellent mulch (spread in a layer on top of the soil) for potted plants. If it is screened, it can be added for potting mixes for seedlings, and finely sprinkled on a lawn as a conditioner. lt can be used directly in the garden, either dug into the soil or used as a mulch.
Common Problems And Solutions
The most common problem is unpleasant, strong odours which are caused by lack of oxygen in the compost due to overloading with food waste so that the food sits around too long, and the bin contents become too wet. The solution is to stop adding food waste until the worms and micro-organisms have broken down what food is in there, and to gently stir up the entire contents to allow more air in. Check the drainage holes to make sure they are not blocked. Drill more holes if necessary. Worms will drown if their surroundings become too wet.Worms have been known to crawl out of the bedding and onto the sides and lid if conditions are wrong for them. If the moisture level seems alright, the bedding may be too acidic. This can happen if you add a lot of citrus peels and other acidic foods. Adjust by adding a little garden lime and cutting down on acidic wastes.
Fruit flies can be an occasional nuisance. Discourage them by always burying the food waste and not overloading. Keep a plastic sheet or piece of old carpet or sacking on the surface of the compost in the bin. If flies are still persistent, move the bin to a location where flies will not be bothersome. A few friendly spiders nearby will help control fly problems!
The Final Word
Taking worms out of their natural environment and placing them in containers creates a human responsibility. They are living creatures with their own unique needs, so it is important to create and maintain a healthy habitat for them to do their work. If you supply the right ingredients and care, your worms will thrive and make compost for you. Happy and successful composting!
Christmas
Worms
"There were worms in the carpet,
worms on the chairs,
worms in the hallway, worms on the
stairs."
The EarthWorm Digest All about EarthWorms.